
All-New Story Content
Depending on certain actions that the player takes, the story can branch out into three different paths:
The Goddess Story, the Vile God Story, and the Evil Goddess Story.
The characters will now become even more deeply entangled in their story!
For example, depending on how the story unfolds, Marianna, one of Dorfa's Heavenly Czars, can accompany Fang on his journey.


6 Characters in Battle
 Battle has evolved to incorporate a 6-person team that more dramatically emphasizes strategic play!
Select Your Difficulty
 The game has been rebalanced to allow the player to select a difficulty based on their preferred playstyle!
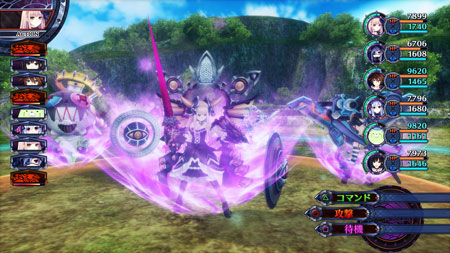
Basic Battle System
The game uses a turn-based battle system. You can now have up to six characters in battle, further enhancing the strategic nature of the gameplay.

You can see the turn order within the Action Window. The order is determined by the speed of each team member and enemy.
"Attack" will let you attack any enemy within range.
"Wait" will raise your defense and cause your next turn to come more quickly.
Use this effectively and you can change the outcome of battle.
"Command" allows you to choose "Skill/Magic," "Items," "Special," "Switch," or "Fairize."

You can use your SP to unleash powerful attacks, heal HP, or utilize a variety of other commands.
Skills are instrumental to helping Fang and the others get through tough battles, so make sure to put them to good use!
*Certain skills require HP to use.


Items can heal HP and SP, remove status effects, or even revive party members
that have been knocked out. Use them wisely according to your situation.

"Special": Every character possesses their own Special command, and the effect differs depending on the character.
"Switch": Use this to swap in reserve party members.
"Fairize": If your Tension Gauge reaches a certain level, you'll be able to use this command.
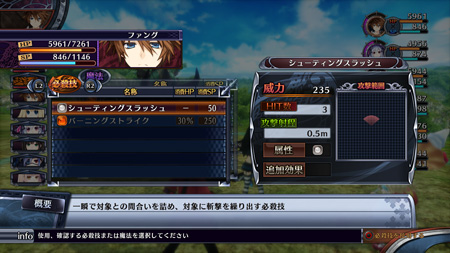
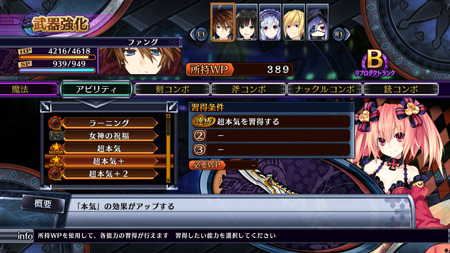
Weapon Boost
You'll be able to freely customize your Furies; forge your own original Fury and leap into the fight! In order to boost your Fury, you'll need to use the Weapon Points (WP) you earn from battle. Simply select the category that you want to boost. Also, there will sometimes be special conditions you'll have to meet in addition to the WP requirement.


When characters level up, different categories will increase but they won't learn any additional abilities or magic spells.
Boost 5 Different Elements
 Categories
In addition to a Fencer's standard attack and defense power, you can also boost their combo (attack) count and range! Some categories can be boosted up to ten times.
 Skills
 Each character can learn unique skills.
 Magic
Magic You can learn element-specific magical attacks, as well as support spells.
 Abilities
 Upgrade your special abilities that can turn the tide for you in even the most challenging battle.
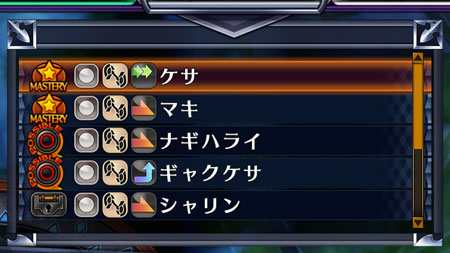 Combos
 Depending on the combo you have activated, your Fury can change form (swords or guns, for example). This will also allow you to call upon different special attacks.
Fairies assist Fencers, and liven up the journey!
Whenever you acquire a new Fury, the fairy residing within it can then join your journey.


Select "Fairies" from the Menu screen to view a list of fairies that have joined you. This will display the detailed status of each fairy, including any abilities they possess.
 Resonance Effect Means More Power!
Similar to equipping armor, the Resonance Effect is a way for Fencers to raise their stats by imbuing the strength of a fairy into a Fury. If you equip a fairy as a Resonance Effect, you can increase a character's power or gain a variety of abilities.
*Fairies will only gain experience if they're equipped as a Resonance Effect.
As the fairy levels up, they'll increase their stats and learn new abilities.
Fairize
Fairize is a strengthened state, like a kind of transformation, brought on by increasing the resonance level of a fairy residing within a Fury.
This will drastically increase a character's attack and defense while in Fury Form.


Once a character's Tension Gauge reaches a certain point, the color of the gauge will change, and it will then be possible to Fairize.
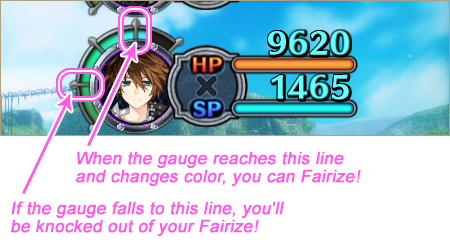 *If the Tension Gauge gets too low while Fairized, the character will be forced out of the Fairize state.
The Tension Gauge will increase whenever you land an attack or defeat an enemy.
The gauge will decrease if you miss an attack, or try and fail to escape a battle.
Attack power will also go up or down along with the Tension Gauge.
*If the Tension Gauge gets too low while Fairized, the character will be forced out of the Fairize state.
The Tension Gauge will increase whenever you land an attack or defeat an enemy.
The gauge will decrease if you miss an attack, or try and fail to escape a battle.
Attack power will also go up or down along with the Tension Gauge.


Some skills are only available during Fairize.
Special Commands & Abilities
The "Abilities" section of Weapon Boost grants characters unique techniques. You can activate these special commands from the Menu screen. Some of these abilities have a constant effect and can be switched on or off. Others, meanwhile, must be activated each time you want to use them. These commands can be further enhanced using the Weapon Boost system.


 Fang's "Serious Face"
Fang's attack power will increase by 1.5x.
Each regular attack will cost 30 SP.
Also, the SP cost of skills and magic will increase by 1.5x.
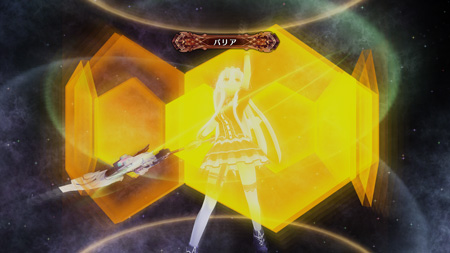 Tiara's "Barrier"
Tiara creates a powerful barrier around herself that halves any damage she takes. Once activated, Tiara can only use "Wait" on her next turn. However, the time until her next turn will be shortened. If your team is in danger of being wiped out and you need a chance to recover, using Barrier and playing defensively is one good way to go.
 Harley's "Analyze"
This will reveal detailed information about the enemy's status.
You can see what items they drop and what items you can steal from them. This is a huge help when you're doing quests or working on a synthesis.
 Galdo's "Full Swing"
While active, attacks will pack a huge punch.
Galdo's accuracy will drop, but his attack power will increase by 2x.
 Ethel's "Assassinate"
Ethel will hunt for the enemy's weak point and attack with a deadly strike. A successful attack will instantly kill the enemy, regardless of remaining HP. But be careful, because if Ethel gets knocked back while she's looking for an opening, the attack will be canceled.
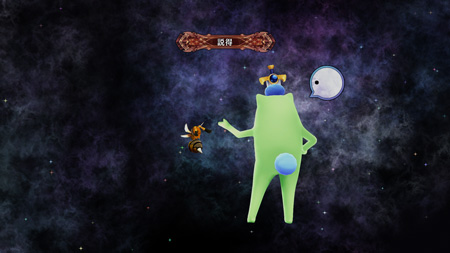 Pippin's "Persuade"
Pippin will attempt to "negotiate" with the enemy.
If successful, the enemy will be driven away.
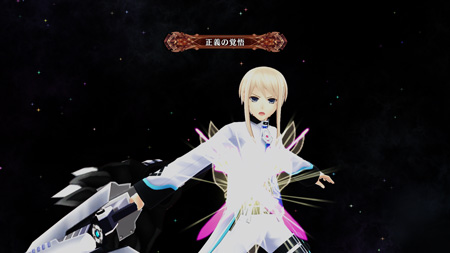 Sherman's "Justice"
Sherman's attack power will increase by 1.5x.
Each regular attack will cost 30 SP.
Also, the SP cost of skills and magic will increase by 1.5x.
 Apollonius's "Taunt"
Apollonius provokes hostility from the enemy. The enemy will target Apollonius, who can then act as a shield that draws attacks to him.
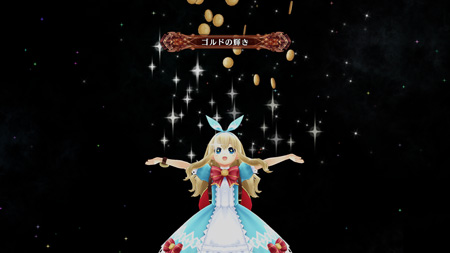 Lola's "Plink-Plink!"
This ability will help you collect gold more efficiently.
If successful, you will gain more gold at the end of battle.
There is a chance that the skill will fail, however, and if it does you will earn less gold at the end of battle.
 Marianna's "Coercion"
Marianna will attempt to intimidate any nearby enemies. Affected enemies will be inflicted with one of the following status effects: Poison, Paralysis, Berserk, Confusion, Silence, Bind, and Debuff. This can succeed regardless of an enemy's ability to resist status effects.
Avalanche Attack
Continuously attacking an enemy with the weapon they're weak to will lower their Guard Gauge.
If their Guard Gauge reaches 0, this will initiate an Avalanche Attack.
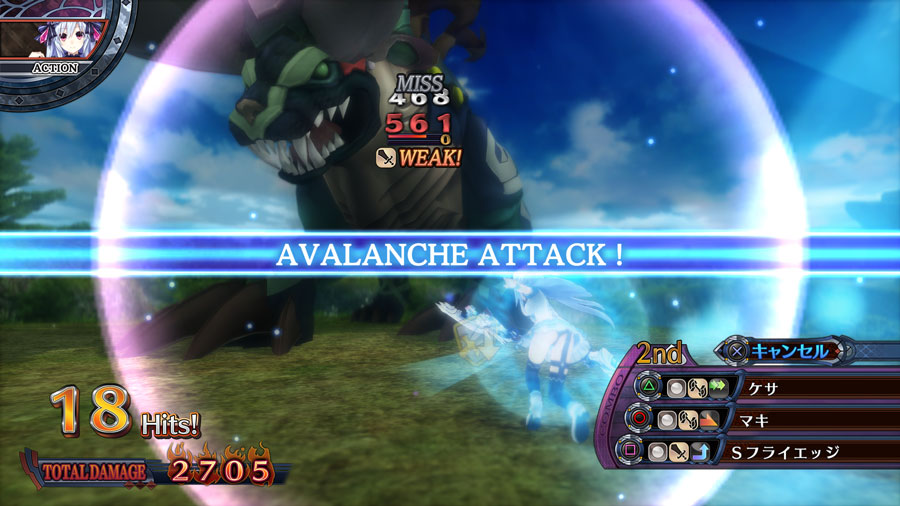
When this occurs, the character who was attacking will come to a stop, but all other team members that are next in the turn order will be able to inflict additional attacks, without delay. However, if the Guard Gauge reaches 0 and there are no team members next up in the turn order, the Avalanche Attack will not occur.

Lesson 1: Attack an enemy with the weapon it's weak to!
Each enemy has its own weakness, so it's a good idea to set a variety of weapon types within your combo attack settings.
If you hit an enemy with a weapon it's weak to, the text "WEAK!" will appear, so keep your eyes peeled!
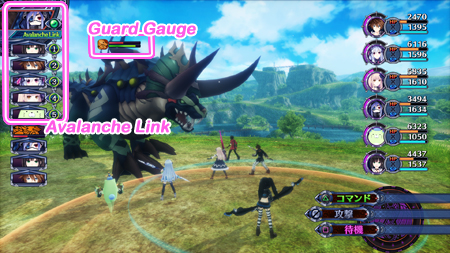
Lesson 2: Keep an eye on the enemy's Guard Gauge!
If you really want to activate an Avalanche Attack, make good use of Harley's unique "Detailed Analysis" ability.
Keep an eye on the enemy's Guard Gauge while you attack and you'll activate it without a problem.
Lesson 3: Check the turn order with the Avalanche Link!
Once you initiate an Avalanche Attack, you can attack with the character connected via the Avalanche Link.
Godly Revival
In order to remove the Furies embedded within the Goddess and Vile God, you must undo their seals.


And in order to do this, you will have to gain access to the fairies housed within the Furies you have collected. Every Fury has a certain ability, and if you want to use that ability, you'll have to borrow the strength of the appropriate fairy.
 Furies and fairies each have a set rank, and if a Fury and fairy have the same rank, then you can release the seal on that fairy.


Once you unleash a Fury and its ability is added to a fairy, you cannot reverse this action. So make sure you carefully analyze a sealed Fury's abilities.
 When you extract a Fury, defensive devices will activate and a battle will initiate, so make sure you're prepared.
World Shaping
World shaping is the process of stabbing a Fury into the ground and sending out an exploratory pulse.


Thrusting a Fury into a "?" icon will let you discover entrances into new dungeons.
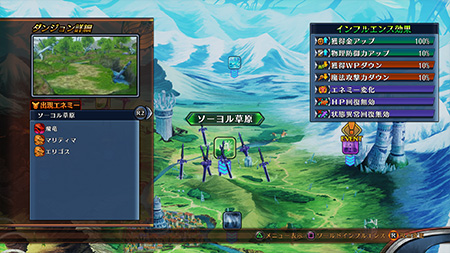
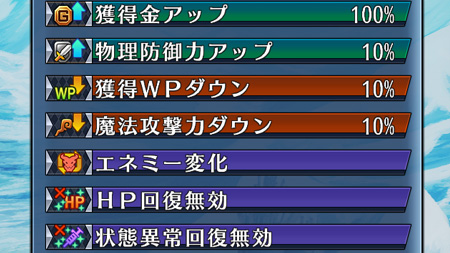
You can also use this opportunity to stack different Fury effects on top of one another. This will let you carry different effects into the dungeon, so put this to good use during battle!
 The area of effect will increase as the fairy levels up.
*Fairies will level up as they gain experience in battle when you equip them through Resonance Effect.
Shukesoo's Tower
This is a mysterious tower that grows taller as you stab more Furies into the ground via World Shaping.


Enemies await you on every floor, and defeating them will unlock a variety of awards.
This is unrelated to the story, but there are certain items you can only obtain here, so it might be worth your time to push toward the top floor...

